Introduction
In this post, I will describe how to dynamically pass parameters to Oracle APEX Rest Data Source Synchronizations. APEX REST Source Synchronizations allow you to declaratively Sync data from an REST API to a local table. Please read this post for more on why you may want to do that.
This works well if you want to synchronize small to medium-sized data sets. The challenge comes when you want to sync larger data sets. For example, you would not want to Synchronize 1 million records over a REST API hourly. We need a way to run our Sync every hour but only pick up records that have changed in the last hour. Oh, and by the way, we want to do this declaratively!
APEX REST Source Synchronization Steps to the Rescue.
Use Case
We have been tasked with Synchronizing Time Entries from the Harvest Time Entry SaaS Application to a local Oracle DB table for use in an APEX Application. We must also:
Finally, the Harvest instance already has over 100,000 time entries, so we cannot Sync all of them every four hours.
Although this example is specific to Harvest, this approach will work for most REST-based APIs.
REST Source
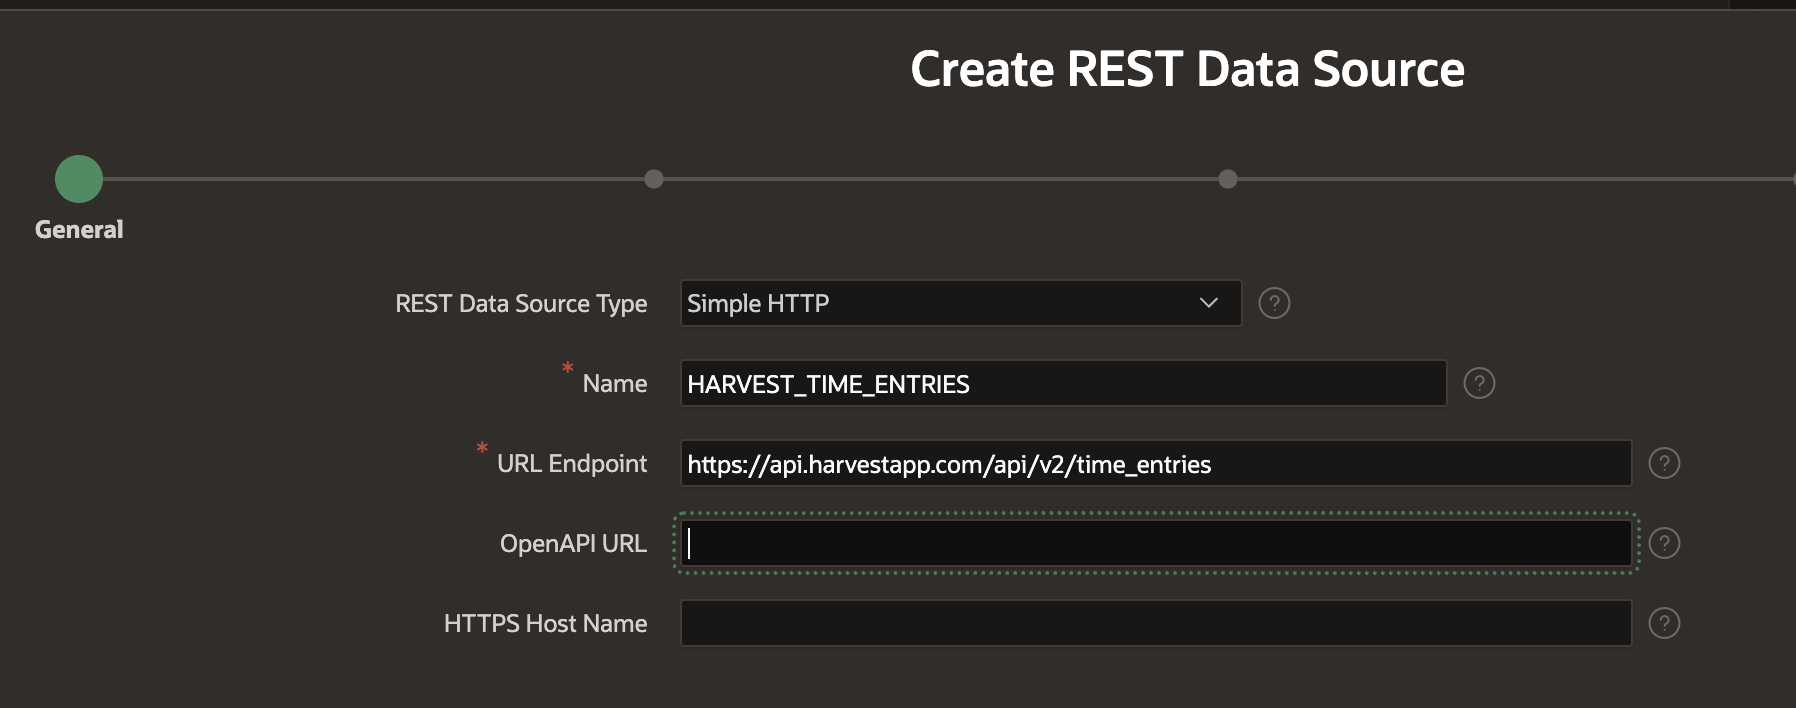
The first thing we need to do is to create a REST Source that we can use to fetch time entries from Harvest. Enter a static ID and the Harvest API Endpoint URL:
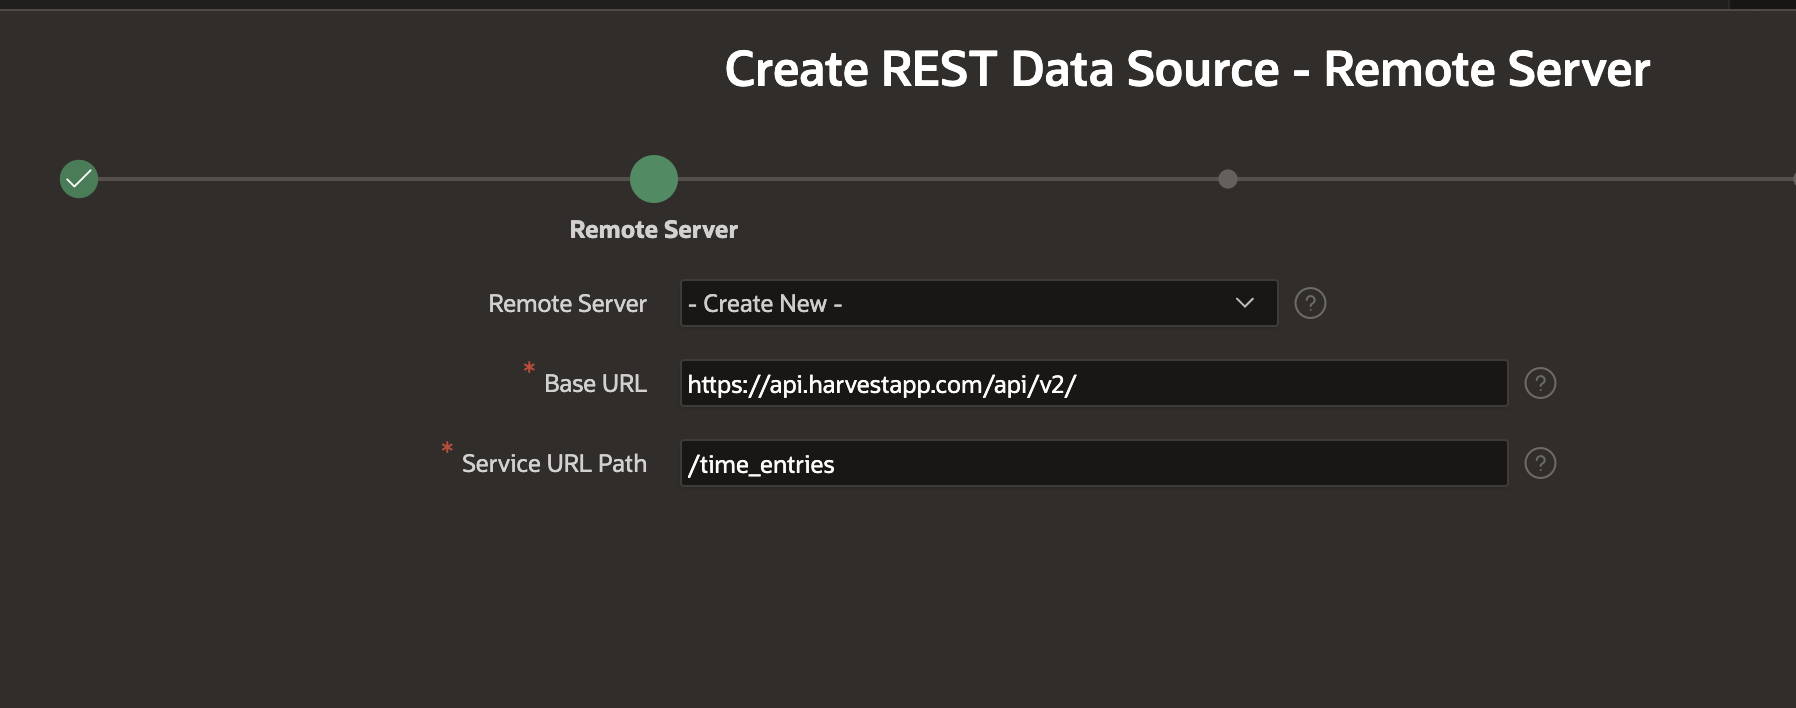
Click Next and confirm the Base URL and Service URL Path:
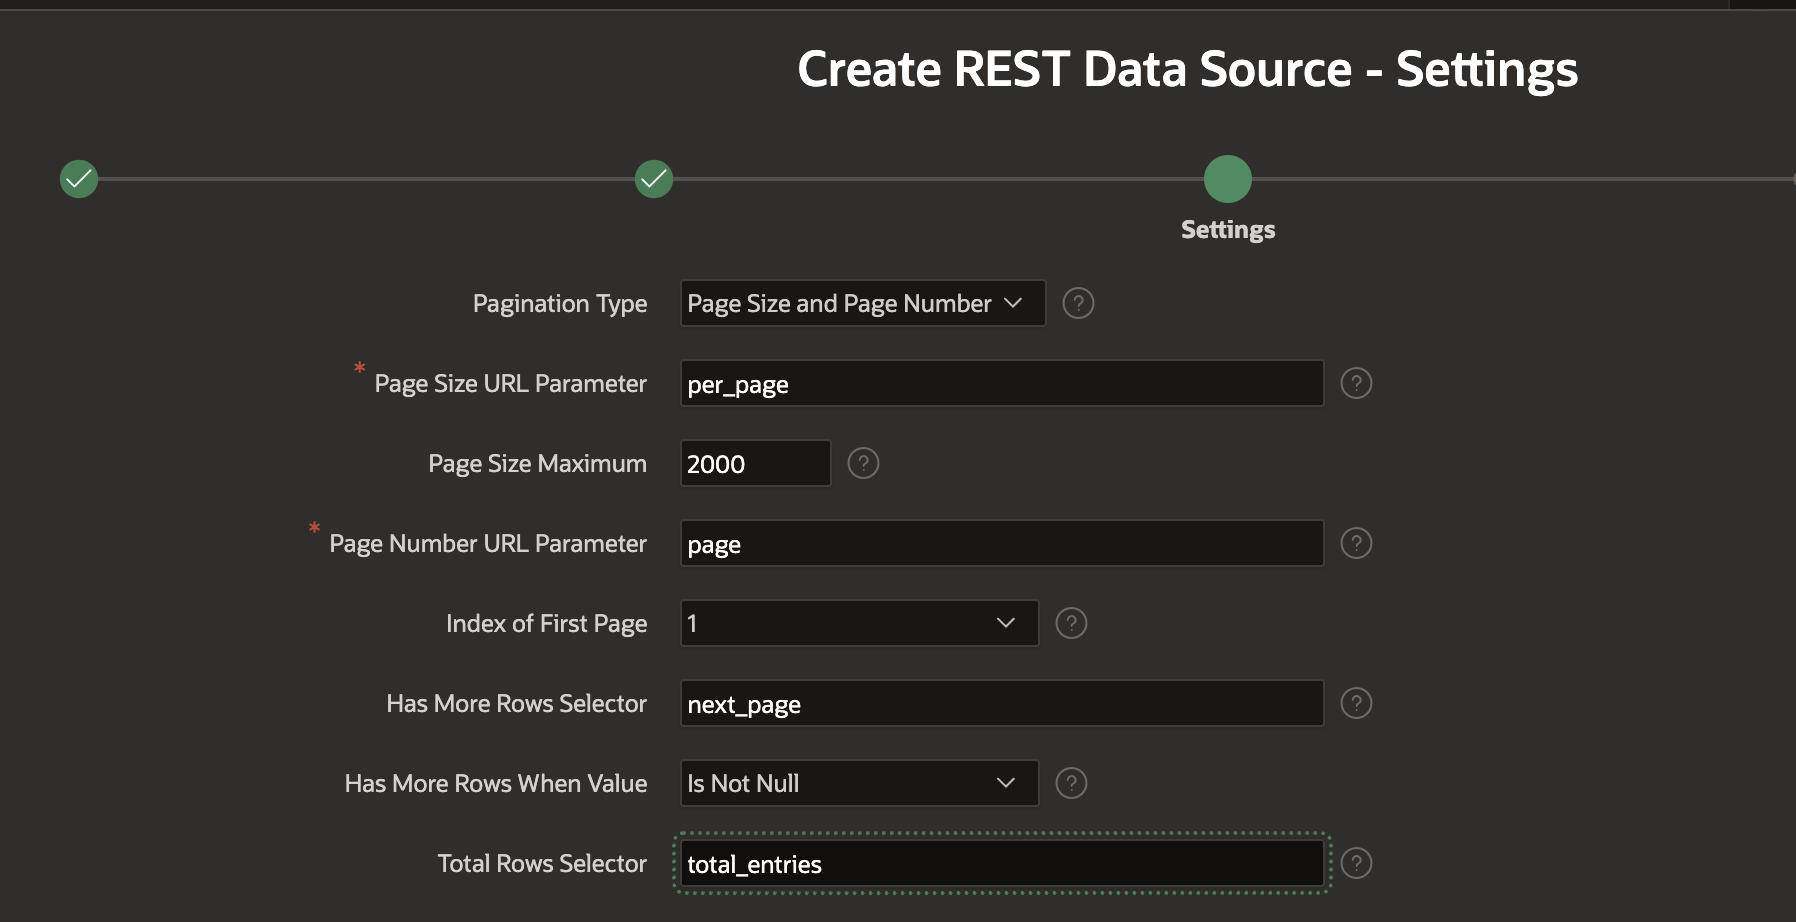
Next, configure Pagination for the Harvest API:
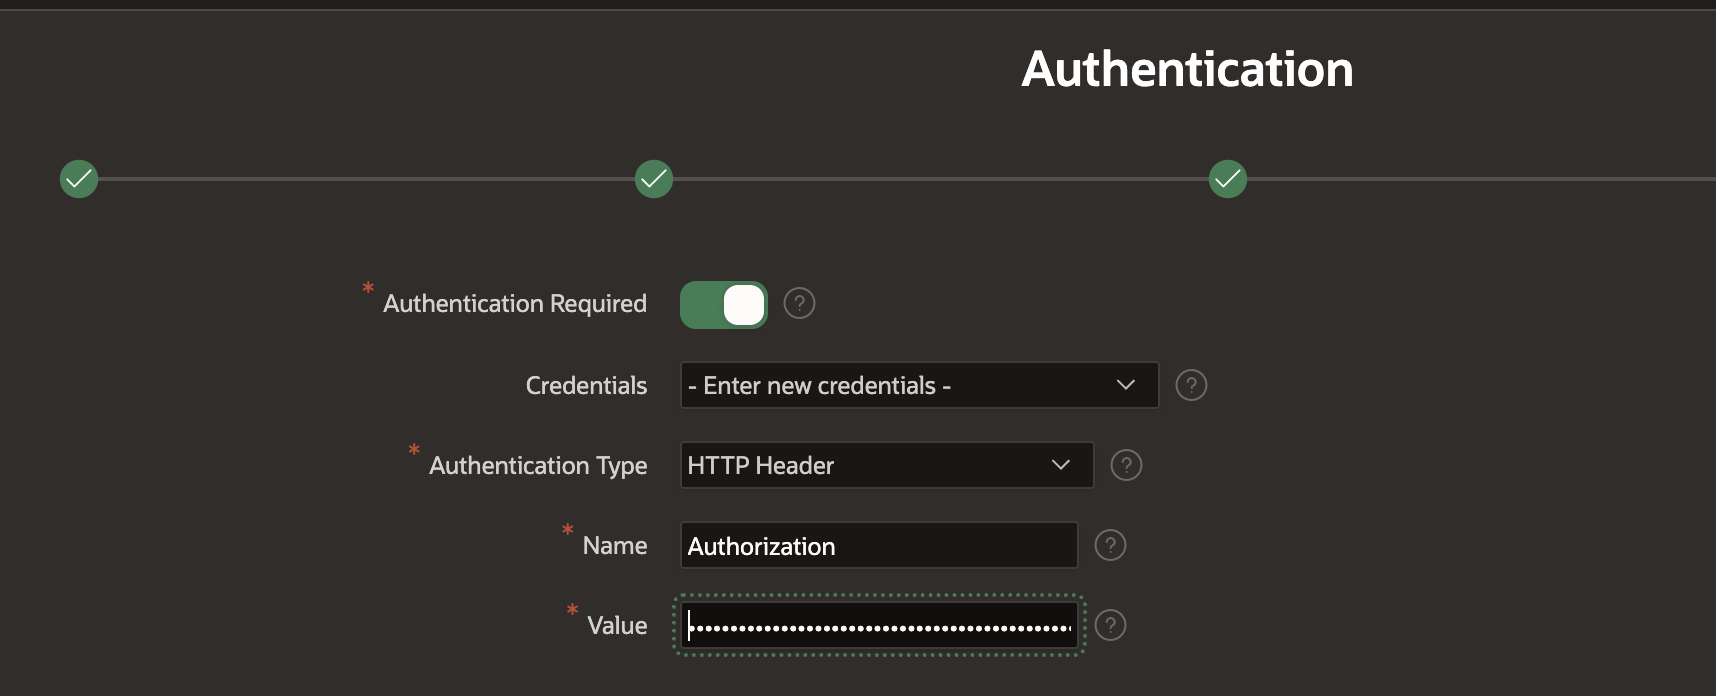
Then, set up a new APEX Web Credential. Note: For Harvest, when entering the 'Value', you need to enter 'Bearer ABC', where ABC is your Harvest API token.
Then, for this particular Harvest API, we need to click 'Advanced' and enter an 'HTTP Header' parameter indicating our company ID (Harvest-Account-ID).

Then, we can click Discover to verify that our REST Source setup works.

We should end up with a REST Source definition that looks something like this.

Add Parameters
For Harvest, we are going to Sync time entries between two dates. Harvest provides two 'URL Query String' parameters for this purpose: from and to. We must set these parameters up in the REST source we just created. The screenshot below shows all three parameters.

Identify a Unique Key
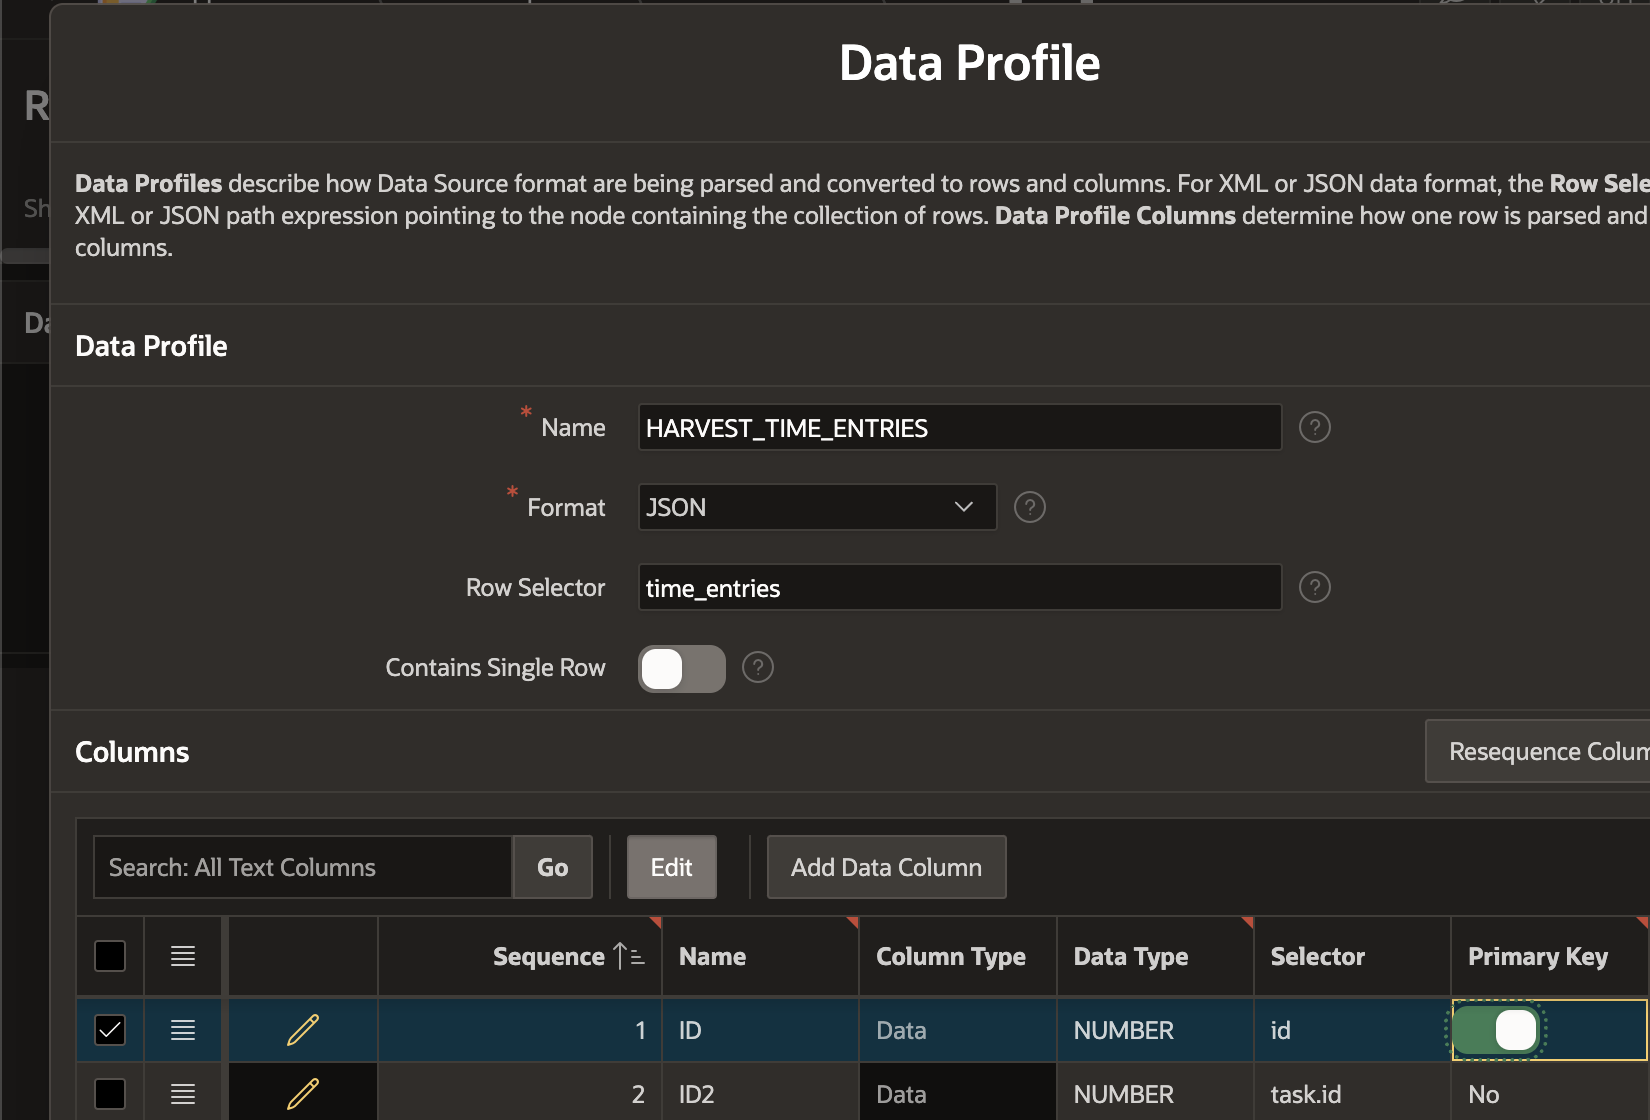
Before moving on to Synchronization, we must identify a Unique Key in the Data Source for our REST Source. Edit the REST Source and click 'Edit Data Profile':
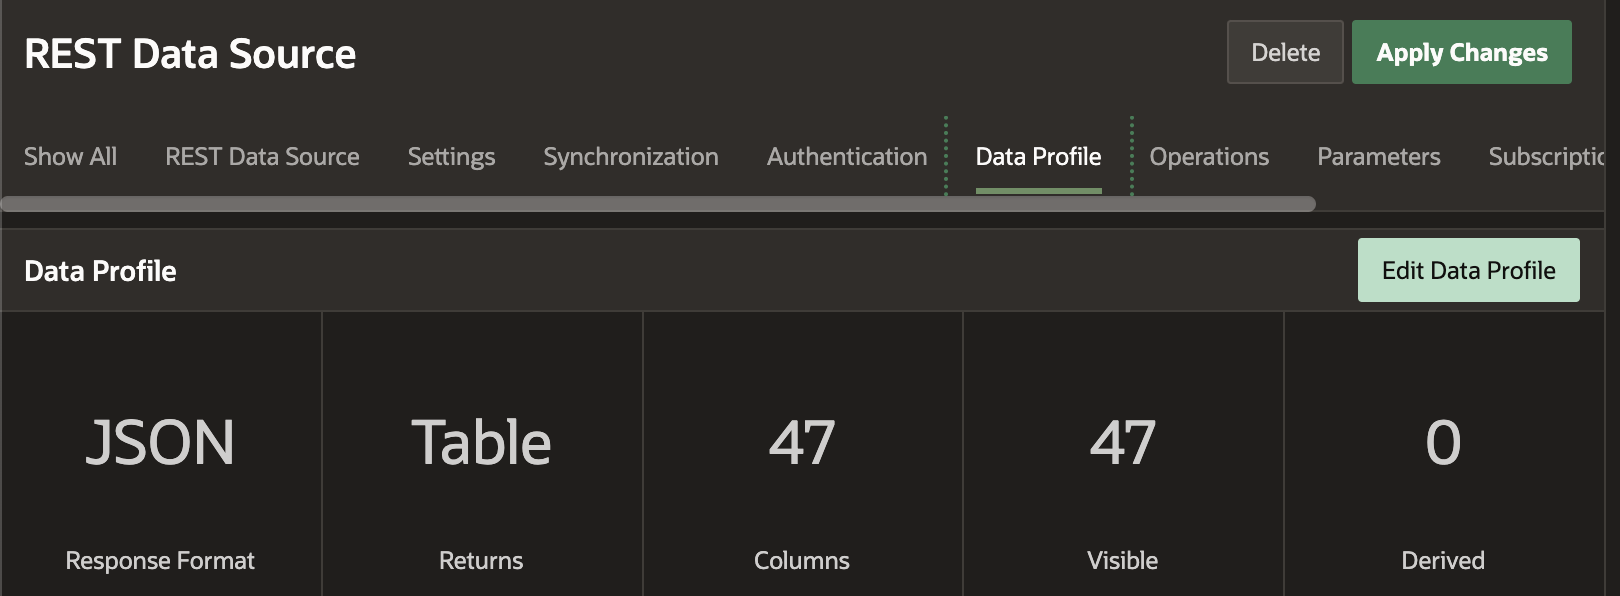
Then, turn on the 'Primary Key' switch for the column that is a unique identifier for each record the REST API returns. In this case, it is the ID column.
Identifying a unique key allows us to perform a Merge operation when syncing records from our REST source.
That completes the REST Source definition.
Setup Synchronization
Now that we have a working APEX REST Data Source, we can configure it to Synchronize to a local table. Start this process by clicking on the 'No' link under the 'Synchronized' column for the REST Source.

Then, enter the table name where you want the data Synced. APEX is going to create this table for you. Alternately, you can create your own table and select it here. If you create your table, you must ensure your table column names match those in the 'Name' column of your REST Source Data Profile.
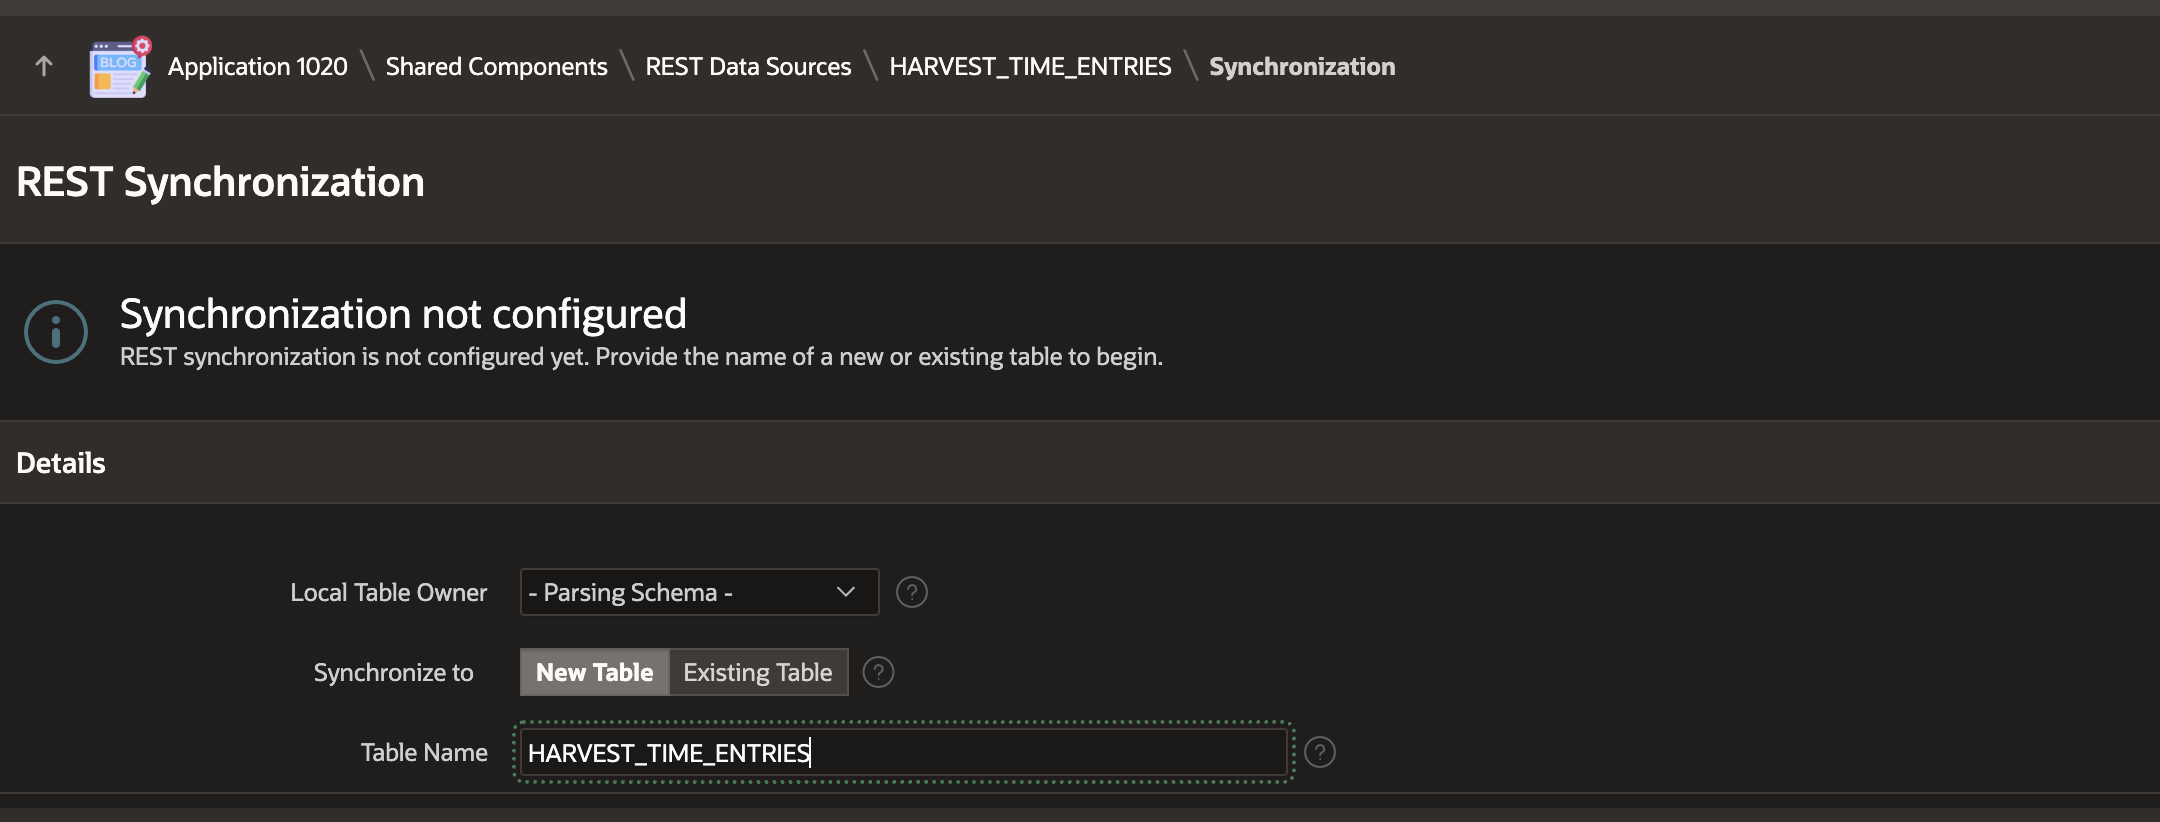
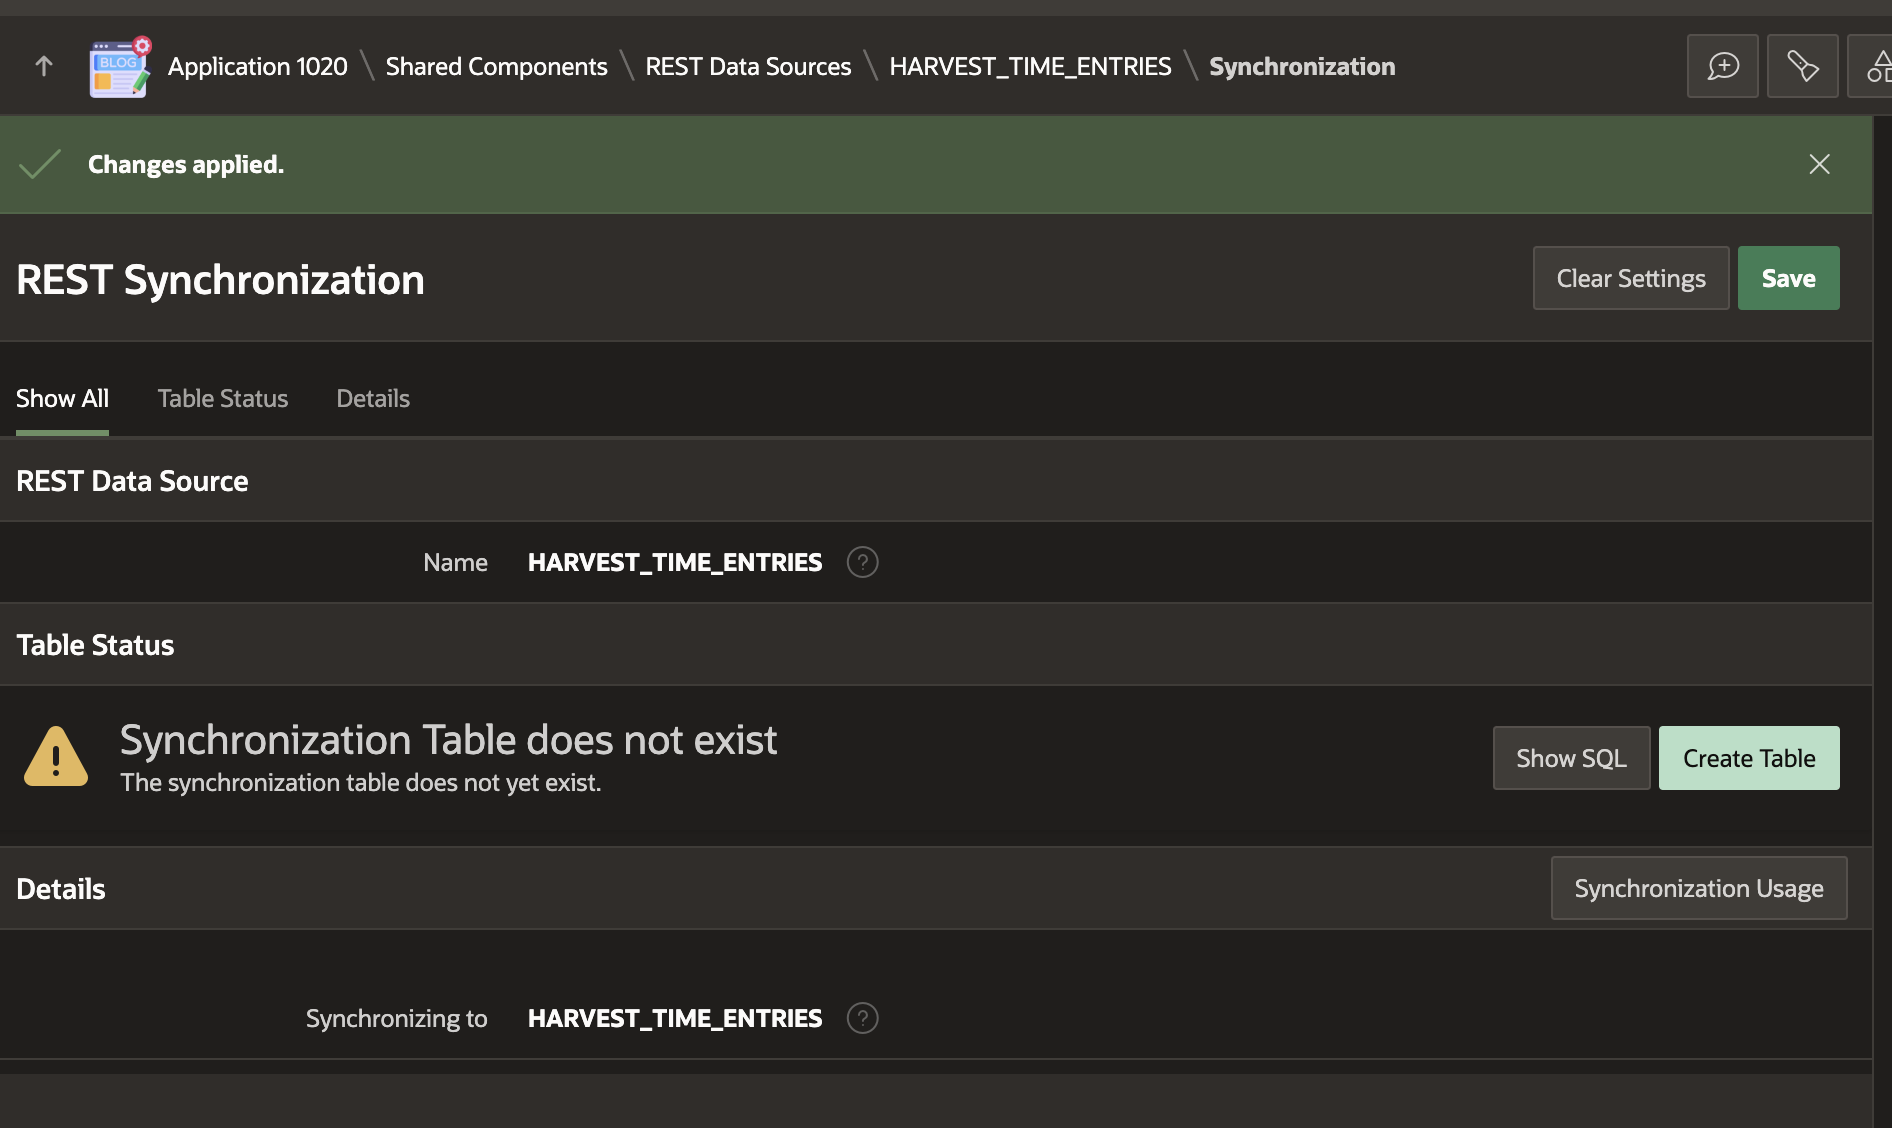
After clicking 'Create Table', your REST Source Synchronization is ready to run.
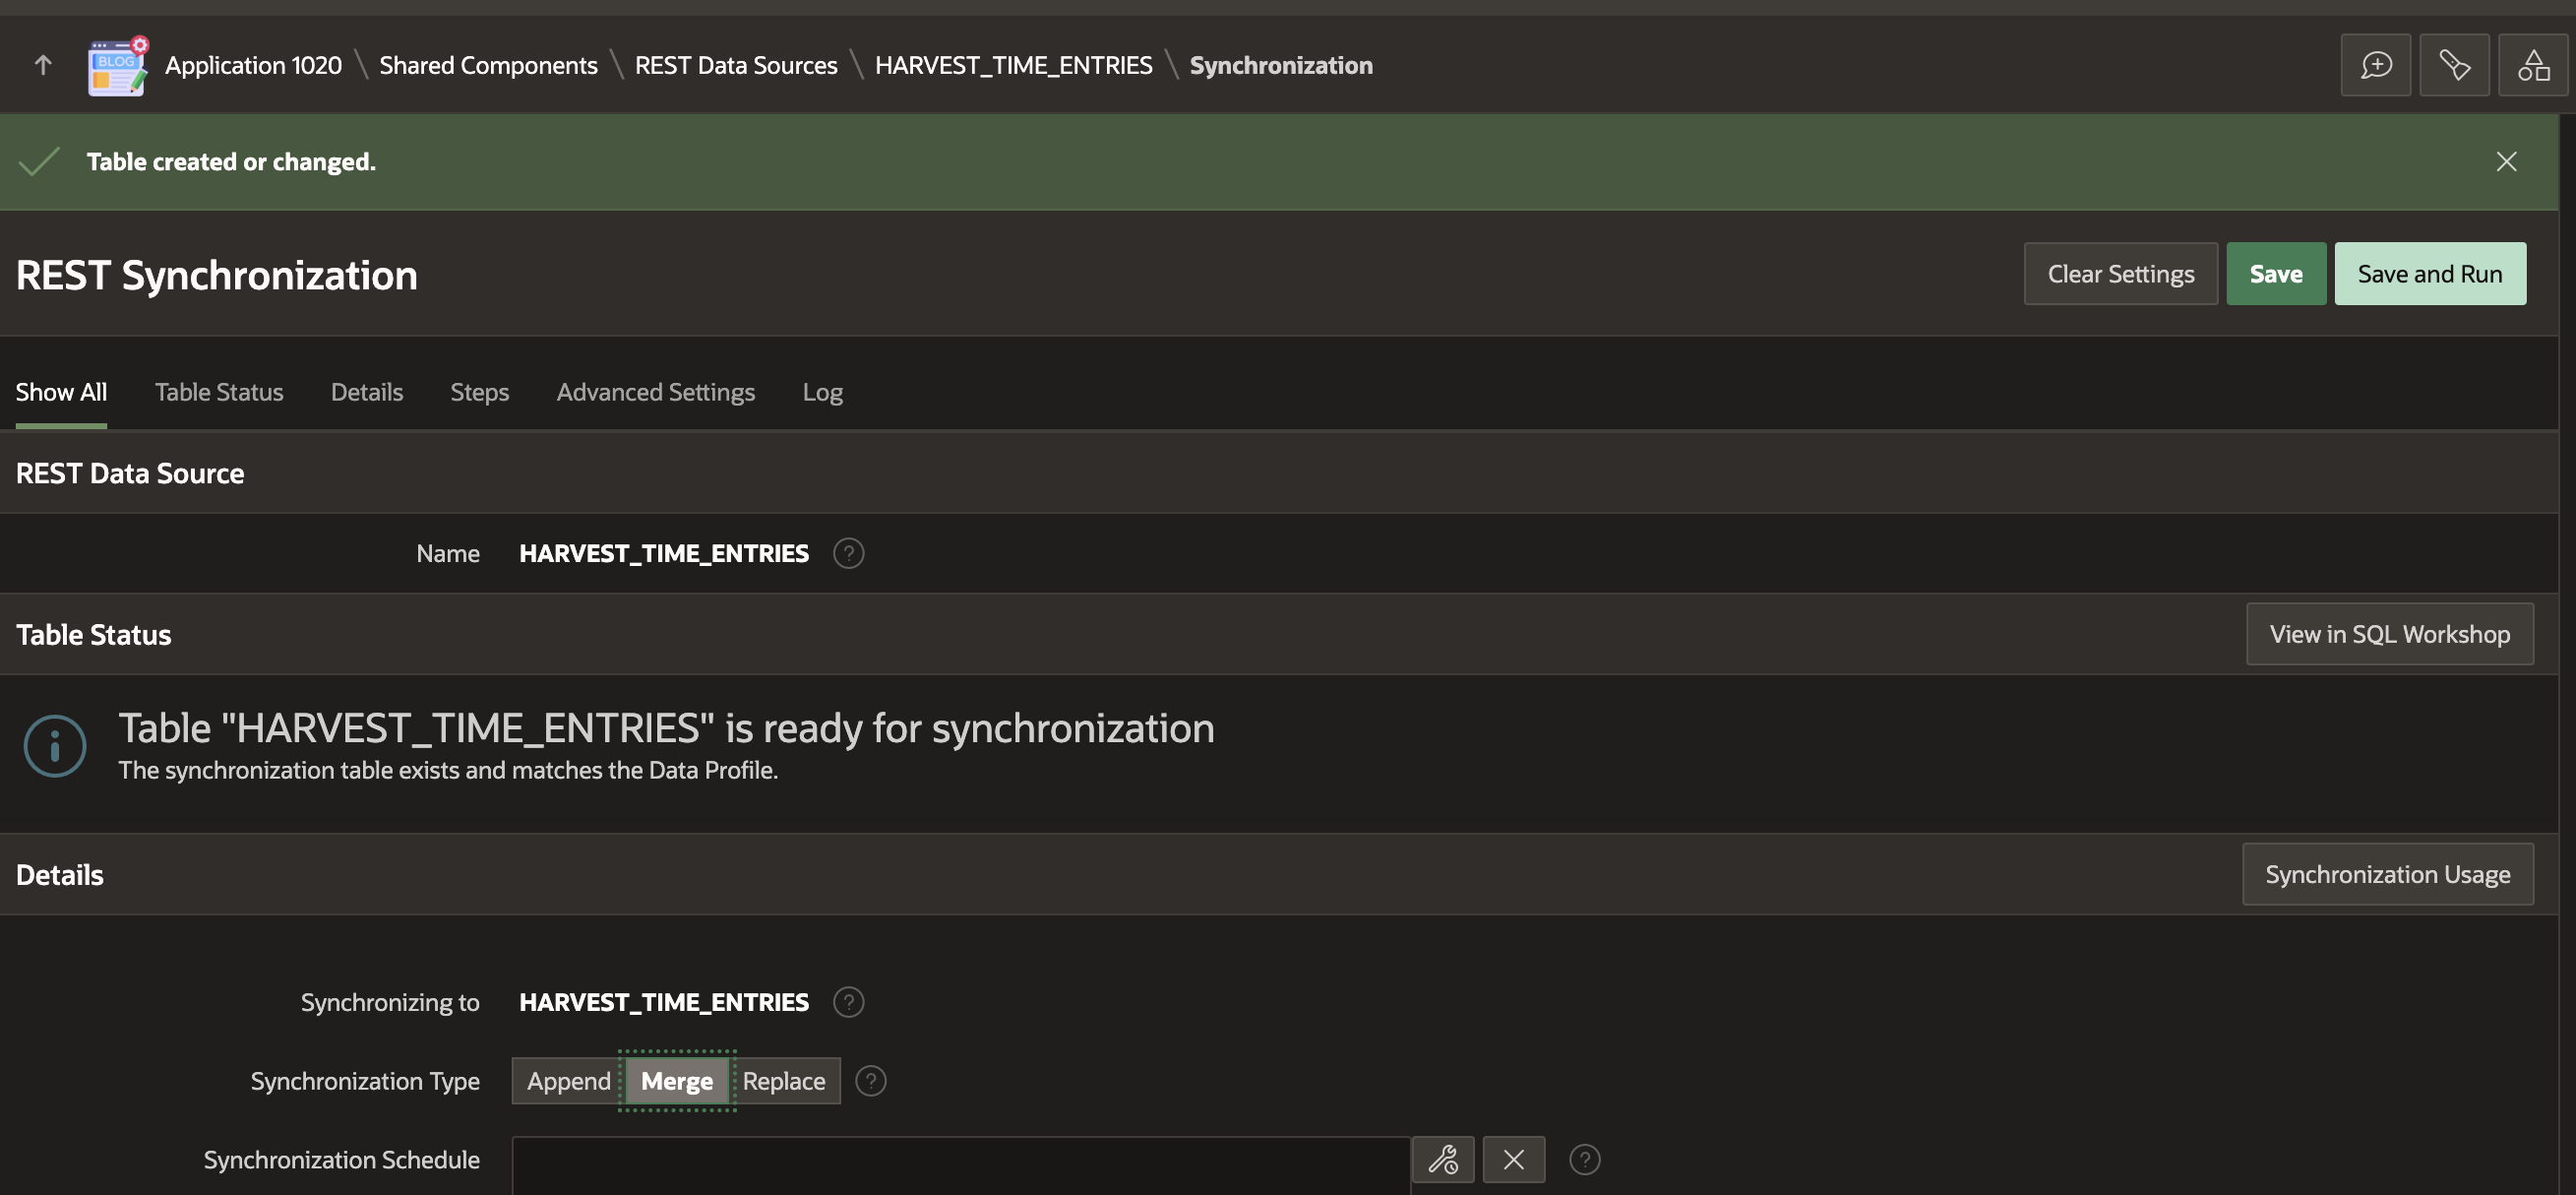
Note that I selected 'Merge' as the 'Synchronization Type'. Merge will use the Primary Key we identified and perform a SQL Merge (Insert / Update) on our table when performing the Sync. This makes sense for time entries because they could change, and we want to update our local table with the latest values.
Schedule the Sync
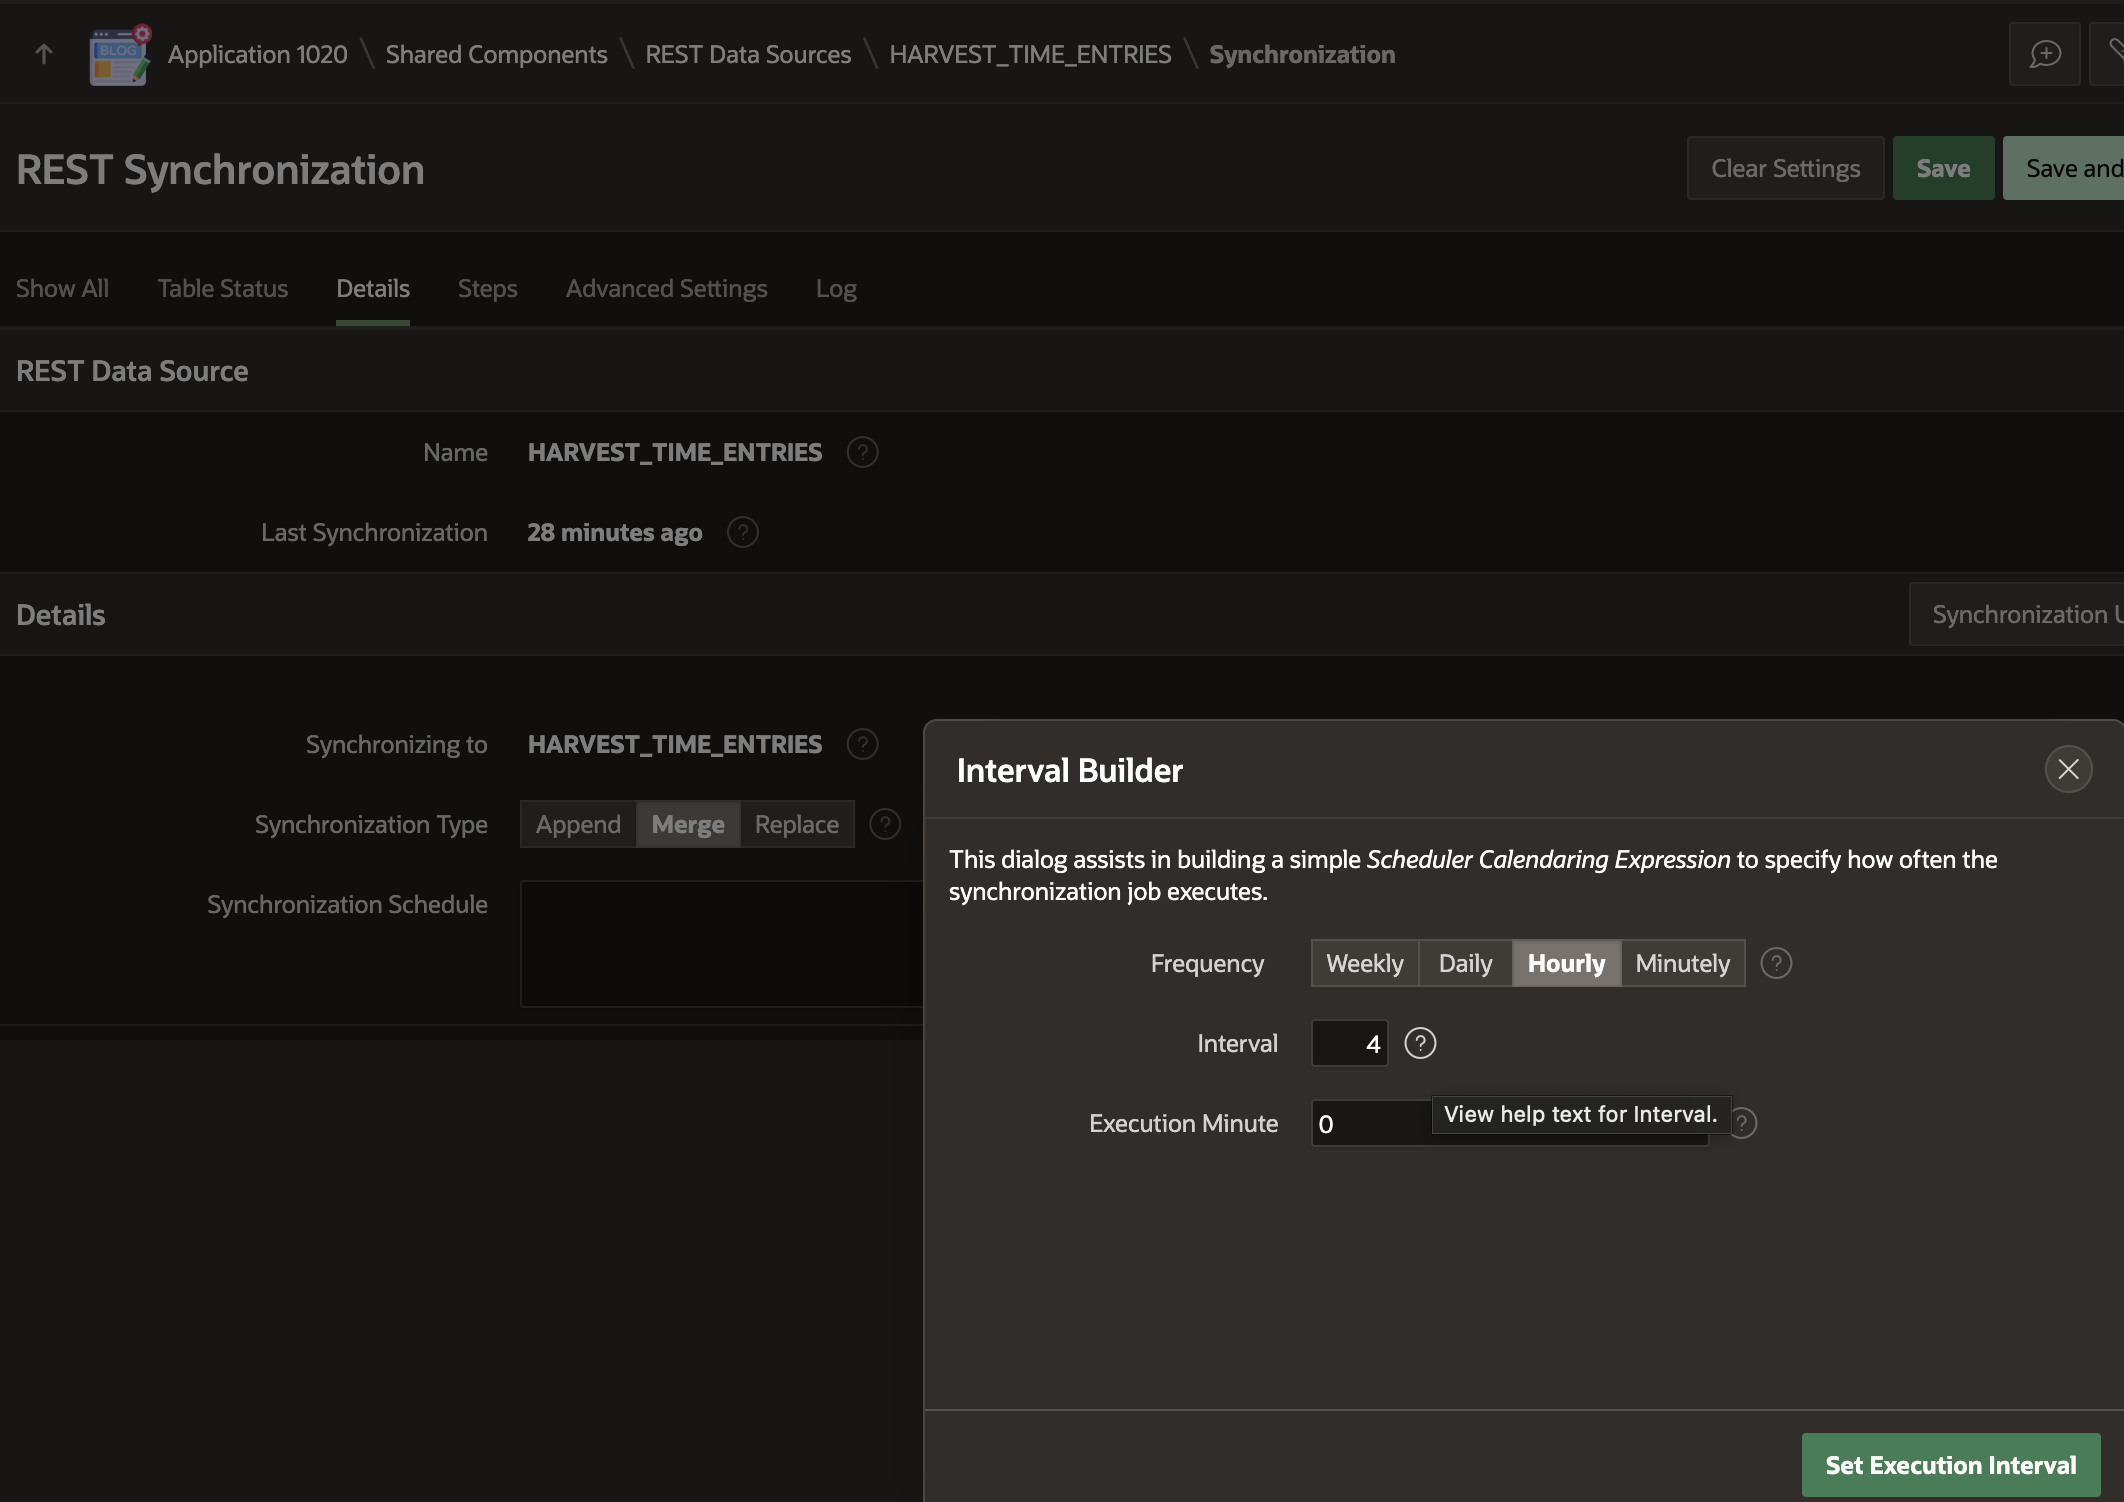
Let's schedule the REST Source Synchronization to run every four hours:
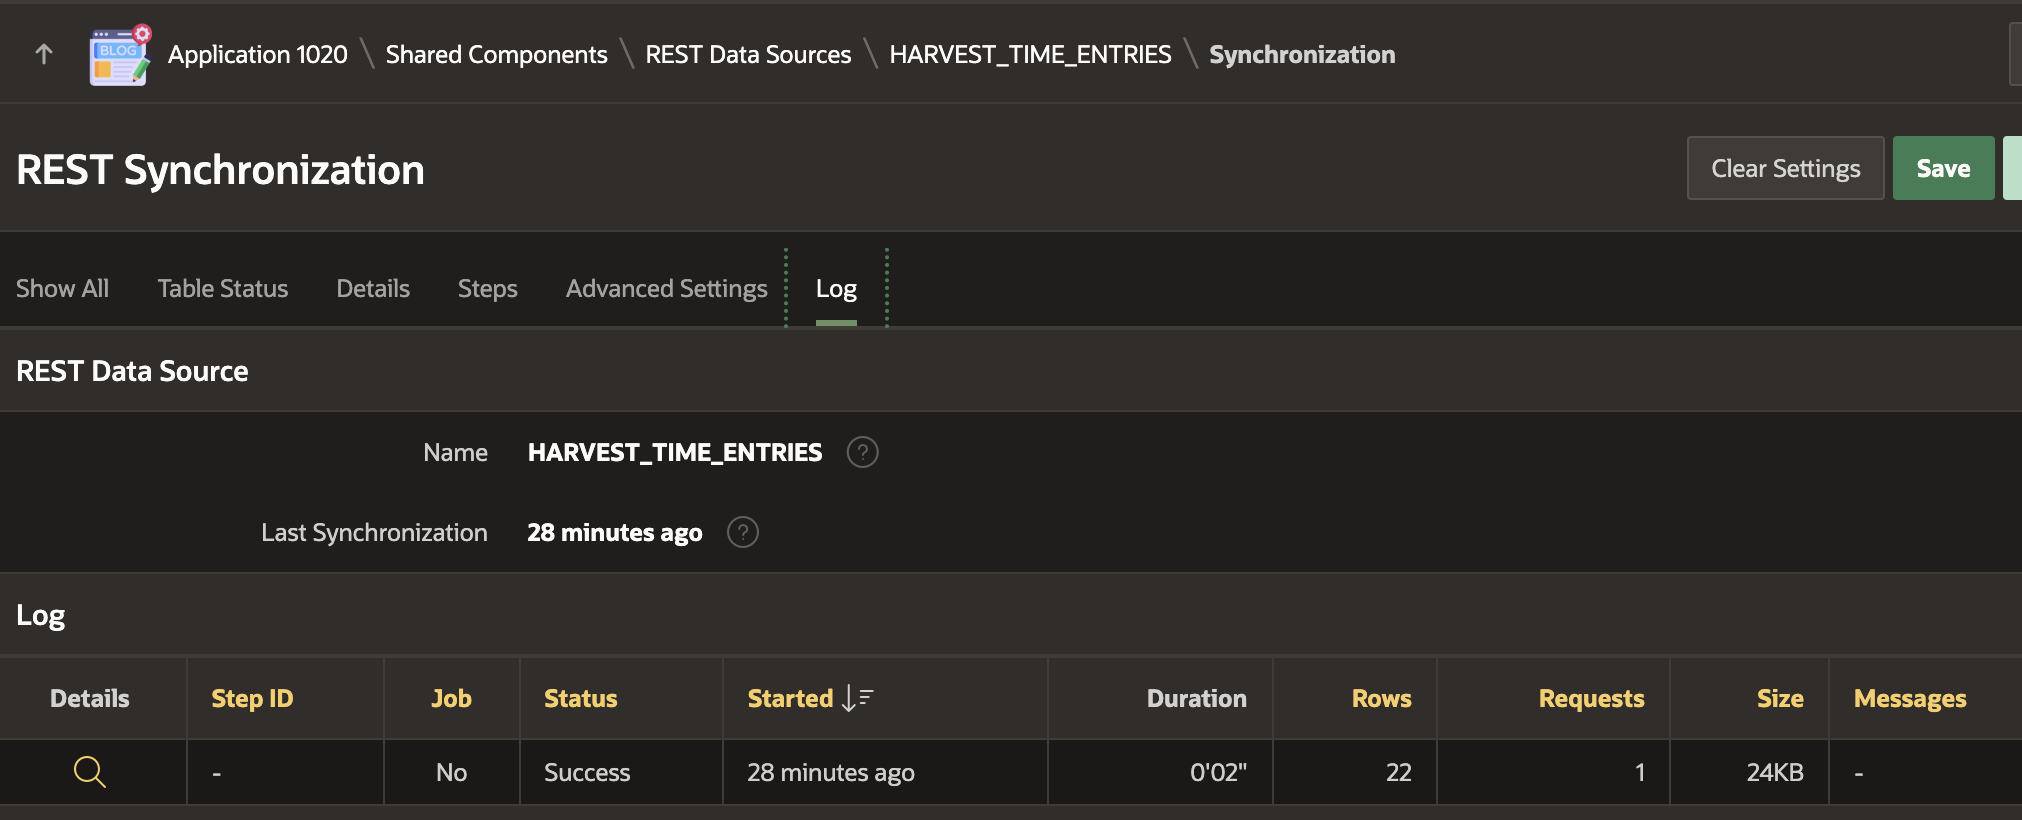
Save and Run the Synchronization to ensure it works as expected and that records are synced to the local table.
Our REST Source and the Synchronization are now ready to go. The problem is, as it stands now, we are going to Sync all the time entries every four hours.
Passing Dynamic Parameters
Finally, we have come to the point of this blog post!
We must create an APEX REST Source Synchronization Step to pass parameters to the REST Source at runtime. To do so, navigate to the Synchronization page for the REST Source.
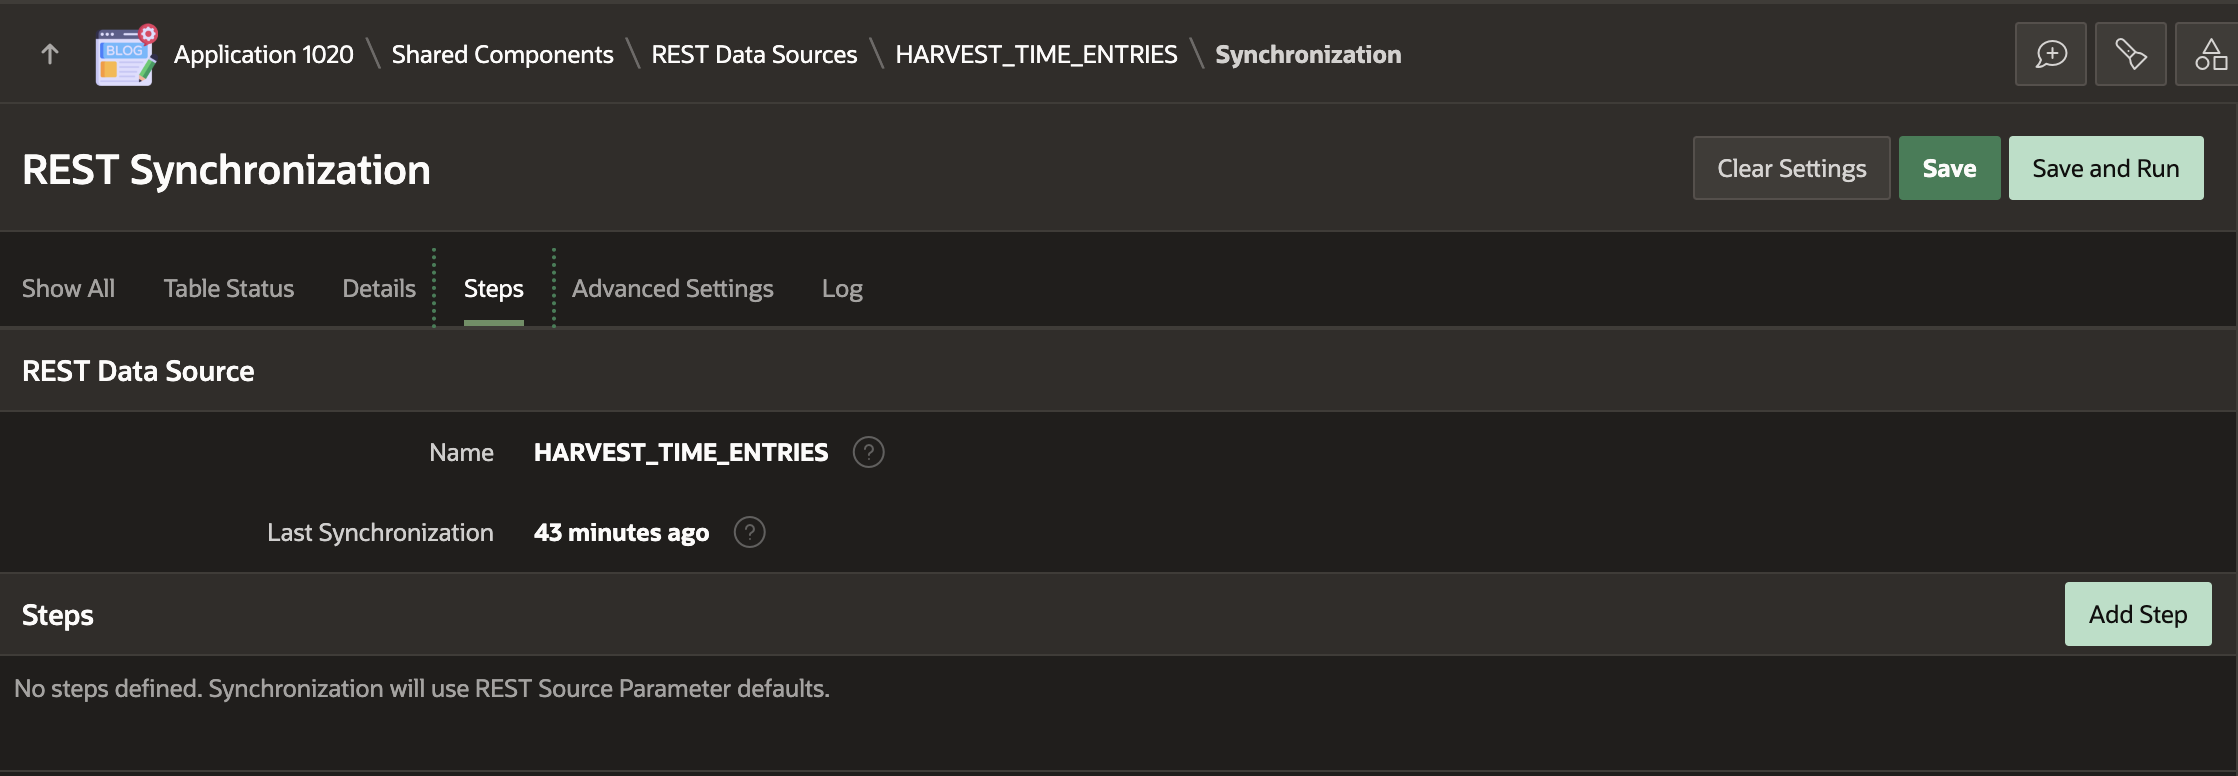
In this case, we want to fetch time entries between 7 days ago and today. To do this, we can use a PL/SQL expression to get the date from 7 days ago, return it to the from parameter, and get today's date for the to parameter. The screenshot below shows the REST Source Synchronization Step with the two parameters configured.
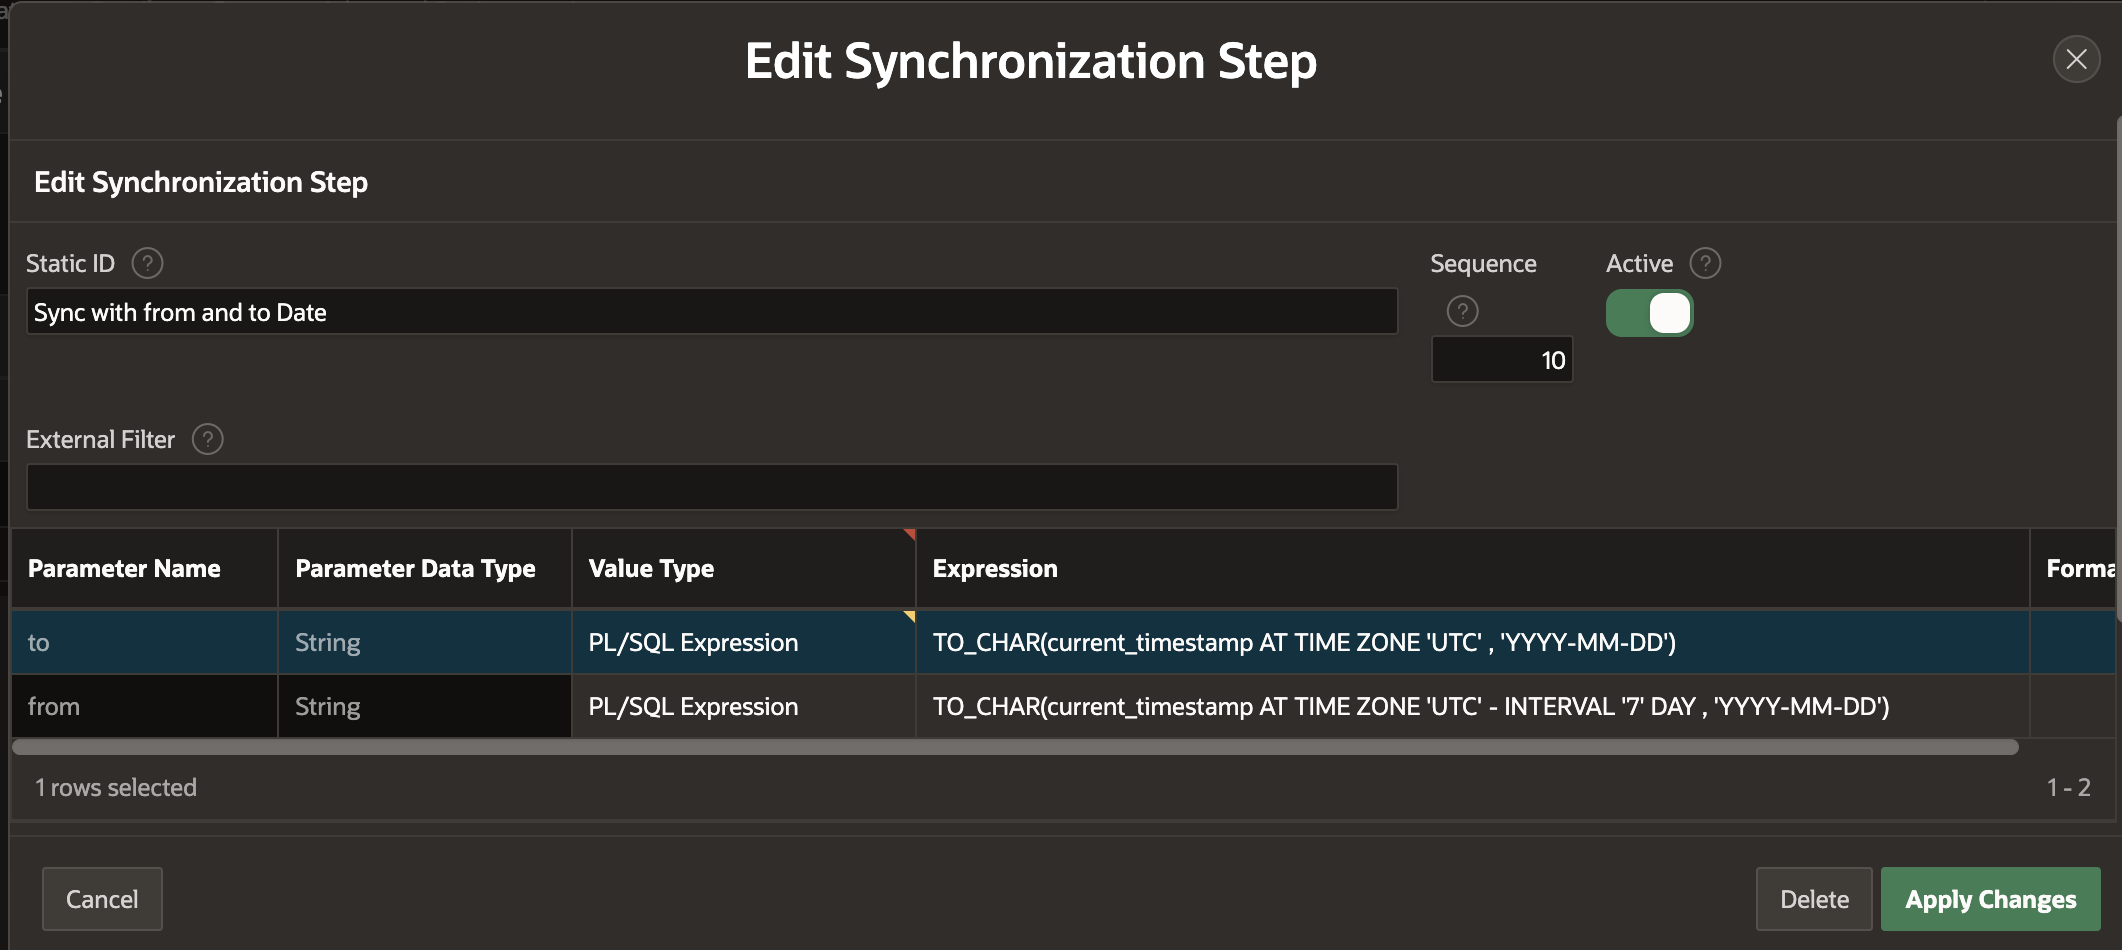
Options for 'Value Type' are:
Static Provide a static value.
PL/SQL Expression Run a PL/SQL Expression as we did above and pass the result to the REST API when the REST Source runs.
SQL Query (return a single value) Pick up a value from a table and pass it to the REST API when the REST Source runs.
PL/SQL Function Body Run PL/SQL code to figure out the parameter value (maybe even call another REST API) and pass it to the REST API when the REST Source runs.
If we run the Synchronization and then navigate to Monitor Activity > Web Service Activity Log, we can see that APEX calculated the from and to parameters at run time and passed them on to the Harvest REST API via the query string in the URL.

Pretty Cool!
Conclusion
In this post, I showed you how to use APEX REST Source Synchronization Steps to pass values into your REST APIs at runtime. This powerful feature is invaluable when performing incremental synchronization of REST APIs to a local table in your Oracle Database.
评论
发表评论